


Whether you are rescuing a classic car from a decades-long slumber, preparing your lawn equipment for the bitter cold of winter, or fixing a costly mistake at the gas pump, knowing how to manage, move, and dispose of fuel safely is an essential skill for any mechanic, DIYer, or homeowner. Discover the best info about How to drain fuel.
Gasoline and diesel are highly volatile substances. Handling them requires respect, the right equipment, and a solid understanding of physics and automotive engineering. A botched fuel drainage job doesn’t just leave a messy garage floor—it can also lead to severe environmental hazards, costly damage to your vehicle’s fuel system, and extreme fire risks.
In this comprehensive guide, we will explore exactly how to drain fuel efficiently (tools and safe methods). We will cover everything from identifying bad gas and selecting the ultimate transfer pumps, to bypassing modern anti-theft valves and preparing your engines for long-term storage. By the end of this article, you will have the expert knowledge required to drain, clean, and store fuel with absolute confidence.
1. Why Do We Need to Drain Fuel?
Before diving into the mechanics of draining fuel, it is crucial to understand why this task is necessary. Fuel is not a stable, immortal liquid. Over time, gasoline degrades, diesel supports microbial growth, and water inevitably finds its way into sealed systems.
The Chemistry of Degradation
Modern gasoline is heavily blended with ethanol. Ethanol is hygroscopic, meaning it attracts and absorbs moisture directly from the air. When left sitting in a tank for more than three to six months, the water and ethanol separate from the gasoline and sink to the bottom of the tank—a process known as “phase separation.” If your engine attempts to burn this water-ethanol mixture, it will run terribly, if it runs at all. Furthermore, oxidizing gasoline leaves behind a sticky varnish that clogs carburetors, fuel injectors, and fuel lines.
Recognizing the Warning Signs
If you aren’t sure whether the gas in your tank has gone bad, your vehicle will usually tell you. The symptoms of contaminated fuel in vehicle systems are distinct and often immediate:
- Hard Starting: The engine cranks endlessly but refuses to catch.
- Rough Idling & Sputtering: The engine shakes, misfires, or sounds like it is struggling for air.
- Stalling: The vehicle dies unexpectedly when you press the accelerator.
- Check Engine Light: Sensors detect a lean or rich mixture or misfires, triggering the Check Engine Light on the dashboard.
- Foul Odor: Old gasoline loses its sharp, chemical smell and takes on a sour, stale, varnish-like odor.
If you encounter these symptoms after a vehicle has been sitting or immediately after filling up at a sketchy gas station, the best course of action is to perform a complete fuel extraction.
2. Absolute Safety First: Preparing Your Workspace
When working with liquid combustibles, complacency is your worst enemy. Gasoline vapors are heavier than air, meaning they sink to the floor and travel like an invisible river. A single spark from an appliance, a dropped wrench, or static electricity can ignite these vapors instantly.
Essential Ventilation Protocols
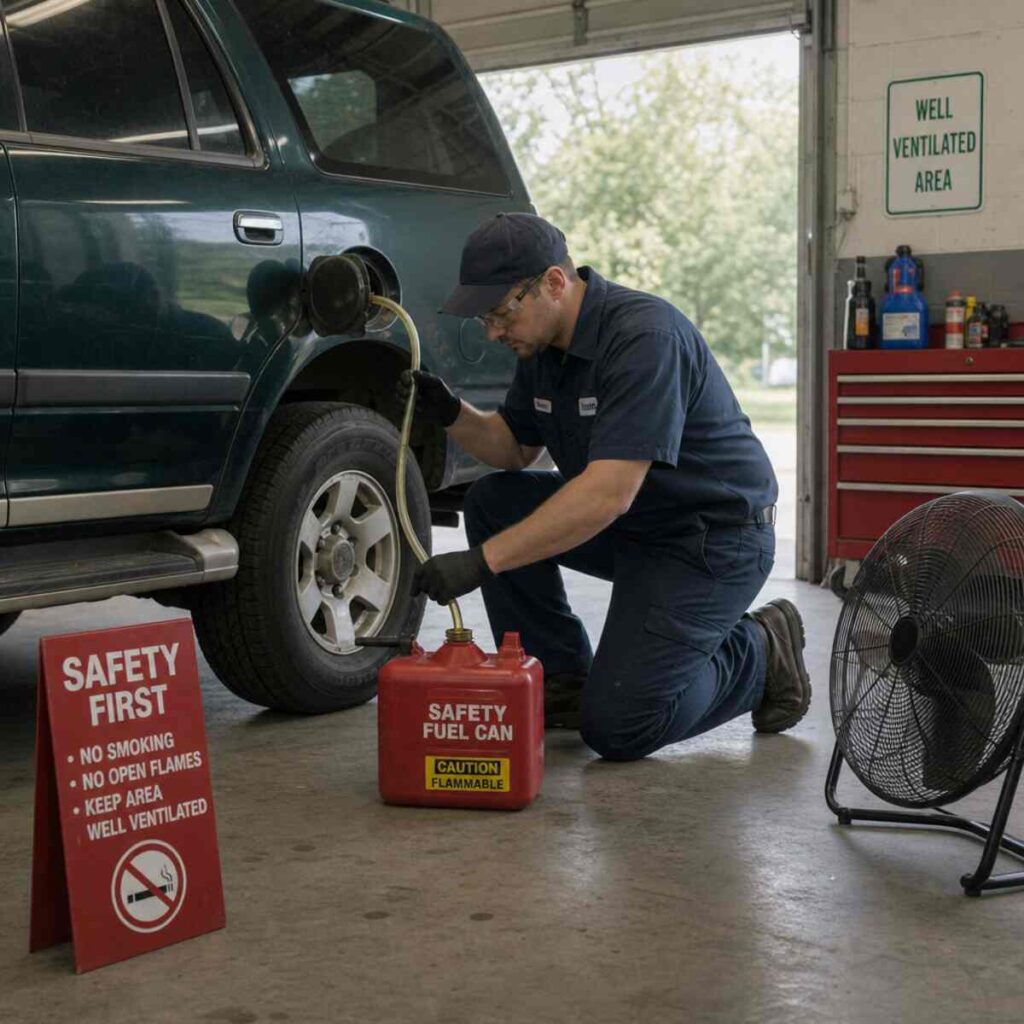
Never attempt to drain a fuel tank in a closed environment. Proper ventilation for indoor fuel drainage is non-negotiable. If you must work inside a garage:
- Open all large garage doors and man-doors to create a cross-breeze.
- Use intrinsically safe, explosion-proof exhaust fans positioned near the floor to push heavy vapors outside.
- Never use standard household box fans, as the unsealed electric motors can generate sparks that ignite fuel vapors.
Eliminating Static Cling
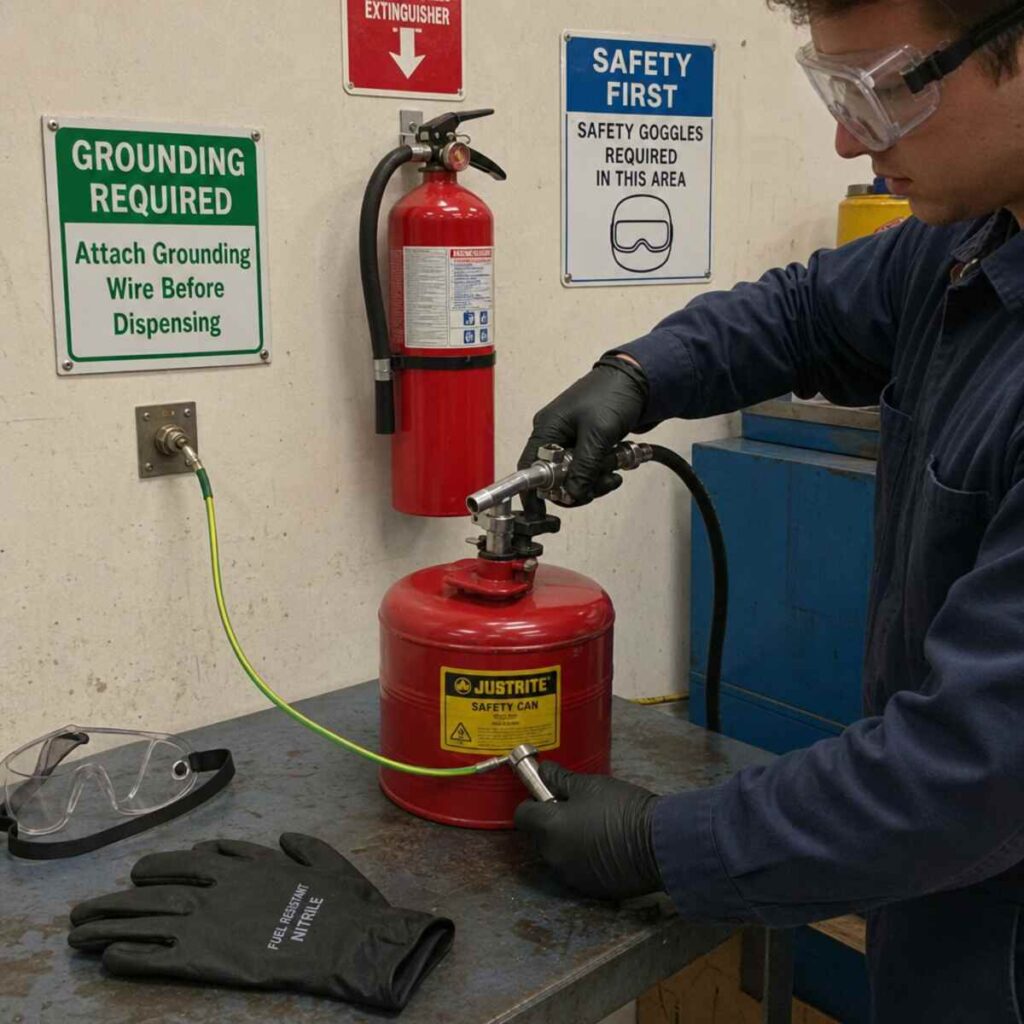
Static electricity is a silent killer in fuel transfer. When liquid fuel flows through plastic hosing, it generates a static charge. Grounding equipment to prevent static sparks is mandatory, especially when transferring large volumes of fuel.
- Always touch a grounded metal object before opening a gas cap.
- Use grounding wires with alligator clips. Attach one end to the vehicle’s chassis and the other to a known ground point (such as a metal water pipe or a grounded workshop rod).
- If using metal storage containers, run a bonding wire between the vehicle tank and the receiving container to equalize their electrical potential.
Fire Extinguishers and PPE
Always keep a Class B fire extinguisher (designed for flammable liquids) within arm’s reach. Additionally, wear nitrile gloves (which resist fuel breakdown) and wrap-around safety goggles. Fuel in the eyes can cause severe chemical burns.
3. The Arsenal: Selecting the Right Tools
The method you choose to extract fuel is entirely dependent on the tools at your disposal. Gone are the days of sucking on a garden hose to start a siphon—a practice that is incredibly dangerous and highly toxic. Today, we have a vast array of specialized, affordable tools designed for specific extraction scenarios.
Manual Siphoning Kits
A manual siphon utilizes the simple physics of gravity and atmospheric pressure to move liquid from a higher elevation to a lower one.
- Jiggle Siphons: These feature a simple anti-reverse copper valve with a glass marble inside. You insert the valve end into the fuel tank and jiggle it up and down vigorously. The movement forces liquid up the hose past the marble, starting the siphon automatically.
- Squeeze Bulb Siphons: These feature a rubber hand-pump integrated inline with the hosing. A few squeezes create the vacuum needed to draw fuel over the tank’s crest and into your container.
Hand-Crank and Rotary Pumps
For larger jobs, such as draining industrial equipment, farm tractors, or 55-gallon drums, hand-operated rotary fuel pumps are indispensable. These pumps mount directly to the top of a drum or tank. By turning a hand crank, you actuate cast-iron or composite vanes that physically pull the fuel up and out. They are incredibly reliable, require no electricity, and can move gallons of fuel per minute.
Electric Fuel Transfer Pumps
If you are working with large vehicles or transferring fuel frequently, manual labor becomes tedious. When weighing a fuel transfer pump vs manual siphoning, electric pumps win in speed and volume.
- 12V DC Pumps: These connect directly to your vehicle’s battery via alligator clips. They are self-priming and can empty a 20-gallon tank in minutes.
- Safety Note: Only buy electric pumps specifically rated for gasoline. Pumping gasoline through a cheap water pump will melt the internal seals and risk an explosion from the unsealed electric motor.
Storage: The Final Destination
Extracting the fuel is only half the battle; you need somewhere to put it. Following flammable liquid storage safety requirements ensures you don’t create a bomb in your shed.
- Color Coding: Always use red containers for gasoline, yellow for diesel, and blue for kerosene.
- The best portable fuel containers for storage are DOT-approved, high-density polyethylene (HDPE) jerry cans, or Type I/Type II metal safety cans with spring-loaded, self-closing lids and flame arrestors.
- Never store fuel in milk jugs, glass jars, or unapproved plastic buckets. Gasoline will rapidly dissolve non-approved plastics.
4. The Basics: How to Siphon Fuel Manually
For small jobs—like emptying a motorcycle tank or pulling a few gallons out of a classic car—manual siphoning remains the most popular approach. Understanding exactly how to siphon fuel using modern tools is a vital DIY skill.
Step-by-Step Guide: How to use a fuel siphon kit
- Position the Vehicle and Container: Physics dictates that a siphon only works if the destination is lower than the source. Park the vehicle on a flat surface and place your approved fuel container on the ground.
- Insert the Source Hose: Feed the intake end of the siphon hose into the vehicle’s fuel filler neck. Push it down until you feel it submerge into the liquid fuel.
- Position the Discharge Hose: Place the other end of the hose deep into the receiving container. Make sure this hose stays put; fuel flowing under pressure can cause the hose to whip out, spraying gas everywhere.
- Create the Vacuum:
- If using a squeeze bulb, ensure the arrow on the rubber bulb points toward the receiving container (indicating the flow direction). Squeeze the bulb firmly 4 to 5 times until you see the fuel crest the apex of the hose and begin flowing downward.
- If using a jiggle valve: Vigorously shake the copper valve end up and down inside the liquid fuel until the hose fills up past the high point.
- Monitor the Flow: Once gravity takes over, the fuel will flow continuously. Do not walk away.
- Break the Siphon: To stop the flow, simply lift the discharge end of the hose up above the fuel level in the tank, or pull the intake hose out of the liquid. The air will break the vacuum, and the remaining fuel will return to the tank.
5. Overcoming Obstacles: Draining Modern Vehicles
If you try to stick a siphon hose down the filler neck of a car built after the late 1990s, you will likely hit a solid blockage. Modern cars feature anti-rollover and anti-siphon valves. These are spring-loaded flaps designed to prevent fuel from spilling in a crash, and to stop thieves from stealing your gas.
So, how to drain a fuel tank when a siphon hose won’t fit? You have to get creative.
Strategy A: Anti-Siphon Valve Bypass Techniques
Sometimes, you can trick the flap into opening.
- The Narrow Tube Method: Standard 1/2-inch siphon hoses are too fat. Instead, use a rigid, thin piece of PEX tubing or narrow 1/4-inch PVC tubing. Cut the end at a 45-degree angle. Gently feed this stiff, angled tube down the filler neck, twisting it slowly when you meet resistance. Often, the rigid angled tip will push the anti-siphon flap open, allowing you to feed a thinner, flexible hose through the rigid tube and into the tank.
- Warning: Never force a tube. If it gets stuck, you may break the flap off and it could end up in your fuel tank, resulting in a massively expensive repair.
Strategy B: The Electric Fuel Pump Extraction Method
If bypassing the neck valve fails, the most efficient way to drain a modern car is to use the vehicle’s own internal fuel pump. This method requires some automotive knowledge but is incredibly effective.
- Locate the Fuel Rail/Line: Under the hood, locate the Schrader valve on the fuel rail (it looks like a tire air valve) or disconnect the main fuel supply line before it reaches the engine.
- Attach a Catch Hose: Secure a length of fuel-rated hose to this disconnected line or valve, and route it safely down into your approved container.
- Bypass the Fuel Pump Relay: Open your vehicle’s fuse box and locate the fuel pump relay. Remove the relay. Using a small jumper wire (with inline fuse protection), bridge the constant-power terminal to the fuel-pump terminal.
- Turn the Key: Turn the ignition to the “ON” position (do not start the engine). The jumper wire will bypass the ECU’s safety shut-off, forcing the electric fuel pump in the tank to run continuously.
- Watch the Flow: The vehicle’s pump will efficiently empty the tank. Once the flow begins sputtering, immediately turn the key off to prevent the fuel pump from burning out while running dry.
Strategy C: Accessing the Sender Unit
If you are dealing with a dead fuel pump, or asking yourself about draining fuel tank without a drain plug when a siphon won’t work, you must go through the top. Most modern vehicles feature an access panel beneath the rear passenger seats or under the trunk carpet. Removing this panel reveals the top of the fuel pump/sender unit.
- Disconnect the battery.
- Clean the area thoroughly to prevent dirt from falling into the tank.
- Use a lock-ring tool to unscrew the retaining ring.
- Carefully lift the entire fuel pump assembly out of the tank.
- You now have a massive, direct hole into the gas tank where you can easily drop a high-volume siphon or electric transfer pump hose.
6. Small Engines: Mowers, ATVs, and Generators
While cars hold large volumes, small engines are actually the most frequent victims of bad gas. Carbureted small engines feature tiny jets that clog almost instantly when exposed to oxidized, varnished fuel.
Step-by-Step: Removing bad gas from lawn mower tank
Lawnmowers, snowblowers, and generators require frequent fuel management.
- Clamp the Fuel Line: Locate the rubber fuel hose connecting the bottom of the gas tank to the carburetor. Use a pair of hose-pinching pliers to clamp it shut.
- Disconnect the Line: Slide the retaining clip back and pull the hose off the carburetor inlet.
- Drain via Gravity: Position a small catch pan or fuel can beneath the hose. Release the pinch pliers. Gravity will empty the tank rapidly.
- Drain the Carburetor Bowl: Emptying the tank is not enough. The carburetor bowl still holds fuel. Locate the small bolt at the very bottom of the carburetor bowl. Unthread this bolt to drain the remaining ounce of fuel. This step is critical to prevent varnish buildup.
The Great Debate: Fuel stabilizer vs draining for winter storage
When winter approaches, equipment owners always face a dilemma: should I drain the fuel entirely, or leave it full with a chemical stabilizer?
- The Case for Stabilizer: If you have metal gas tanks (like on classic motorcycles or older tractors), leaving the tank empty invites condensation. Moist air causes rust inside the metal tank. In these cases, fill the tank to the absolute brim (leaving no room for air) and add a high-quality fuel stabilizer. Run the engine for 10 minutes to pull the stabilized fuel into the carburetor.
- The Case for Draining: If your equipment has a plastic fuel tank (most modern lawn mowers, weed whackers, and snow blowers), rust is not an issue. In these cases, complete drainage is superior. Empty the tank completely, start the engine, and let it run until it dies from fuel starvation. This ensures the entire system is bone dry, guaranteeing an easy start next season.
7. The Aftermath: Cleaning and Restoration
Simply draining contaminated fuel is rarely the end of the job. If the fuel sat long enough to turn to varnish, or if water caused the tank to rust, adding fresh fuel will immediately ruin the new gas. Cleaning a fuel tank after drainage is a mandatory step for true restoration.
Inspecting the Damage
Once the tank is empty, use a flexible LED bore-scope camera (or a flashlight if you have a large access hole) to inspect the interior walls.
- Plastic Tanks: Look for a thick, brown, sticky residue at the bottom.
- Metal Tanks: Look for flaking rust, scale, and pitting.
The Cleaning Process
- Degreasing: For sticky varnish, fill the tank with a mixture of hot water and heavy-duty dish soap, or a dedicated commercial engine degreaser. Let it soak for 24 hours. If the tank is removed from the vehicle, drop a handful of loose nuts and bolts attached to a string into the tank and shake it vigorously. The hardware acts as an abrasive, scrubbing the walls.
- Rust Removal (Metal Tanks): If you find rust, you must neutralize it. Products containing phosphoric acid or mild muriatic acid solutions work wonders. Alternatively, soaking the tank in white vinegar for three days will safely dissolve light surface rust.
- Drying: This is the most crucial step. Never put fuel into a damp tank. Use a shop vacuum (blowing in reverse) or an air compressor to circulate air through the tank until it is perfectly dry.
- Sealing (Optional): If the metal tank was heavily rusted, you might need to apply an epoxy-based liquid fuel tank sealer. You pour this liquid in, roll the tank around to coat all walls, and let it cure. It creates a brand-new, impervious polymer lining inside the old metal shell.
8. Environmental Responsibility: Safe Disposal
You have successfully drained 15 gallons of foul, watery, varnished gasoline. What do you do with it?
One of the most heavily regulated aspects of DIY automotive work is the safe disposal of old gasoline. Gasoline is a hazardous material. It contains benzene, toluene, and heavy metals that are incredibly toxic to local ecosystems.
What NOT to Do
- Never pour fuel down a storm drain. A single gallon of gasoline can contaminate up to 750,000 gallons of drinking water.
- Never pour it on the ground or use it as a weed killer. It destroys soil microbiology and poses an enduring fire hazard.
- Do not burn it off. Using large quantities of old gas to start bonfires is wildly unpredictable and causes countless severe burn injuries every year.
The Proper Disposal Protocols
- Store it Safely: Transfer the bad gas into certified, tightly sealed, clearly labeled transport containers (DOT-approved red jerry cans).
- Dilution (For minor degradation): If the fuel is only slightly old (6 to 9 months) and doesn’t contain water, you can often “dilute” it. Add one gallon of the old fuel to a modern car’s nearly full tank of fresh fuel. Modern fuel injection systems and computers can easily compensate for a slight drop in octane without damaging the engine.
- Hazardous Waste Facilities: For heavily degraded, watery, or rusted fuel, you must take it to a professional. Search for your local county or municipal “Household Hazardous Waste” (HHW) drop-off facility. Most local dumps or recycling centers have specific days where residents can drop off old fuel, oil, and antifreeze for free or for a very small fee.
- Auto Parts Stores: While almost all auto parts stores accept used motor oil, very few will accept old gasoline. Do not bring old gas to an auto parts store without calling ahead to verify their policy.
9. Advanced Troubleshooting and FAQs
Even with the right tools, draining fuel can present unique challenges. Here are answers to some of the most complex situations you might encounter.
What if I accidentally put diesel in my gas car (or vice versa)?
This is a panic-inducing scenario, but it is salvageable if you do not start the engine. If you realize your mistake at the pump:
- Do not even turn the key to the “accessory” position, as this primes the fuel pump and pushes the wrong fuel into the engine lines.
- Call a tow truck and bring the car home or to a mechanic.
- You must completely drain the tank using the sender-unit access method or an electric extractor.
- Once drained, add a few gallons of the correct fuel, and use an electric transfer pump to flush the lines before attempting to start the vehicle.
How do I drain a boat’s fuel tank?
Marine fuel tanks are notoriously difficult to access because they are often built deep within the hull and feature complex baffles (internal walls that prevent fuel from sloshing).
- Standard siphons rarely work due to the complex filler neck routing.
- The best method is to disconnect the main fuel line at the water-separating fuel filter. Attach a high-capacity 12V marine-safe electric transfer pump to this line and pump the fuel into portable dockside containers. Ensure all marine grounding protocols are followed, as fiberglass boat hulls generate immense static electricity.
Can I clean and reuse a siphon hose that sucked up bad gas?
Yes, but it requires care. Bad gas leaves behind sticky varnish. After using a siphon kit, immediately pump a small amount of fresh, clean gasoline or a carburetor cleaner through the hose to flush it. Hang the hose vertically in a well-ventilated area so it can drip dry and allow all residual fumes to evaporate.
10. Summary Checklist: The Golden Rules of Fuel Drainage
To consolidate everything we have covered, keep this quick-reference checklist in mind the next time you face a tank full of unwanted fuel:
- [ ] Assess the Symptoms: Confirm the fuel is actually bad (by smell, phase separation, or rough idling).
- [ ] Setup the Safety Zone: Work outside or with industrial cross-ventilation. Keep a fire extinguisher ready.
- [ ] Kill the Sparks: Disconnect the vehicle’s battery (unless using the relay method) and ground your equipment.
- [ ] Pick the Right Tool: Use a manual jiggle siphon for small jobs, and a 12V electric transfer pump for large jobs.
- [ ] Bypass Wisely: If facing an anti-siphon valve, use the fuel pump relay trick rather than forcing a hose down the neck.
- [ ] Clean Up: Inspect the tank with a flashlight, degrease it, and dry it thoroughly if contamination was severe.
- [ ] Dispose Ethically: Transport the dead fuel in DOT-approved containers to a municipal hazardous waste center.
Conclusion
Mastering the process of draining fuel is about balancing mechanical ingenuity with strict adherence to safety protocols. Whether you are extracting a few ounces of stale gas from a push mower or emptying 20 gallons of bad fuel from a modern truck, the principles remain the same: respect the volatility of the fluid, utilize the proper extraction tools, and never compromise on ventilation or static grounding.
By investing in high-quality manual siphons, understanding how to safely leverage electric fuel transfer pumps, and knowing exactly how to navigate modern anti-theft valves, you can turn a potentially dangerous and messy chore into a smooth, professional-grade operation. Take your time, prioritize safety gear, and remember that safe disposal is just as critical as the extraction itself. Armed with these techniques, you are fully equipped to handle any fuel-related hurdle in your garage.